Category: Wash and go

  • Achieving A Flawless Twist Braid Out

    Achieving A Flawless Twist Braid Out

    Twist braid outs aren’t just a hairstyle; they’re a statement. Born out of creativity and a rich cultural heritage, they offer versatility that celebrates natural beauty in its true form. This frosty, coiled look is more than just stylish—it’s deeply rooted in tradition. When I was in University, this was my go-to style as I did not have time to get to a hairdresser it was easy for me to maintain. I also learned how to love my hair through this process.

    Why exactly is a twist braid out worth the effort? For starters, it’s gentle on your hair compared to heat styling methods. Think healthier locks that can shine in any weather. It’s about showing love to your hair, letting it thrive while looking fabulous.

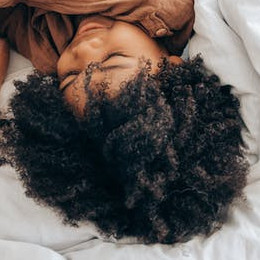
    Many are enchanted by twist braid outs’ ability to create volume while defining curls. Just look at your favorite celebrities rocking this look at events or even on an off day. These styles are trendy because they’re remarkably stunning and adaptable.

    Every twist, every turn of hair tells a story. With a twist braid out, you’re part of a movement embracing natural curls with pride. Whether it’s the ease of transforming a casual day look to an elegant evening do, there’s something downright magical about it.

    The Essentials: Preparing for the Perfect Twist Braid Out

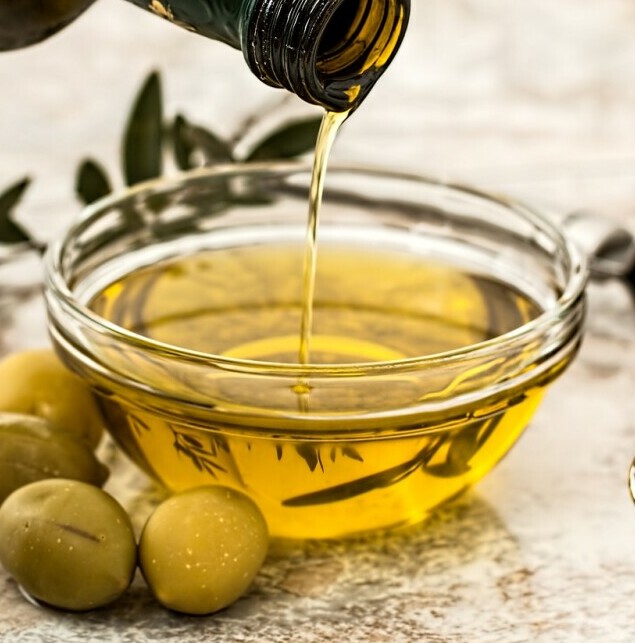
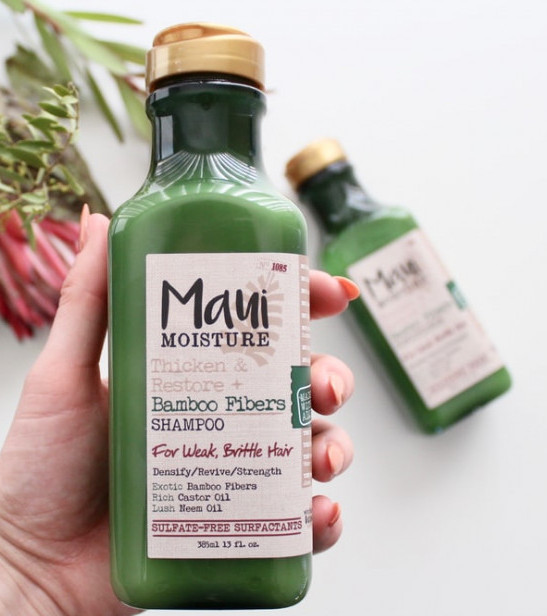
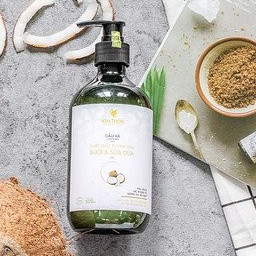
    Picking the right products is like choosing the perfect outfit—it just makes everything come together beautifully. Whether your hair is thick or fine, knowing which gels, creams, or oils work best is key. With so many products out there, it can be confusing. For tighter curls, heavier creams might be your best friend. Meanwhile, lightweight gels could be the go-to for managing looser curls.

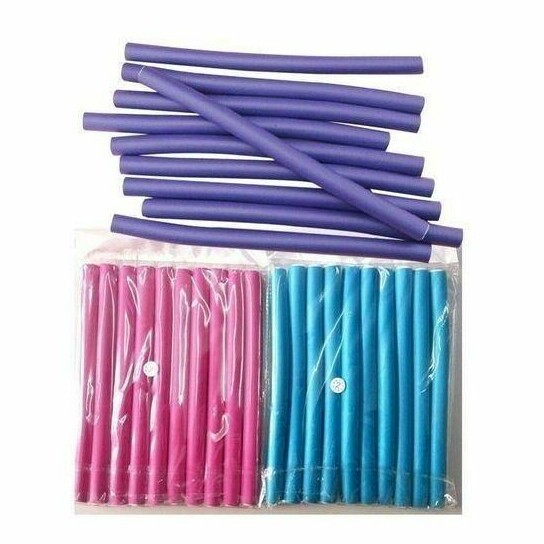
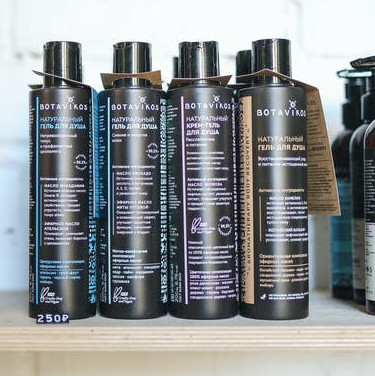
    Ever tried twisting without a comb? Yeah, let’s not do that again. Having the right tools is half the battle. Good tools ease the process, protect your hair, and keep it looking neat. I’m talking sturdy combs, trusty clips, and a heat protector for those moments when heat might be in the picture.

    Now, we can’t talk about preparation without a good start. Cleaning and conditioning your hair sets the stage for all the magic. Freshly washed hair takes on twists better and lasts longer. With a well-detangled mane, say goodbye to unwanted knots and hello to smooth, defined twists. It’s not just prep work—it lays the groundwork for a showstopper of a hairstyle. When I used to do a twist out, I always did it the night before and would then take it out in the morning.

    Mastering the Art: Step-by-Step Guide to Perfecting Your Twist Braid Out

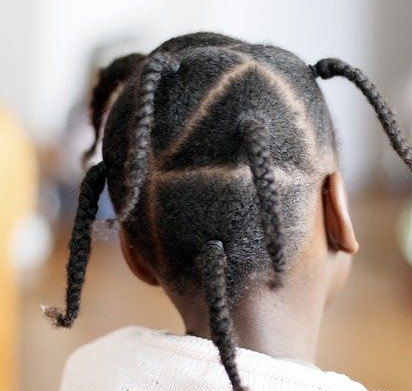
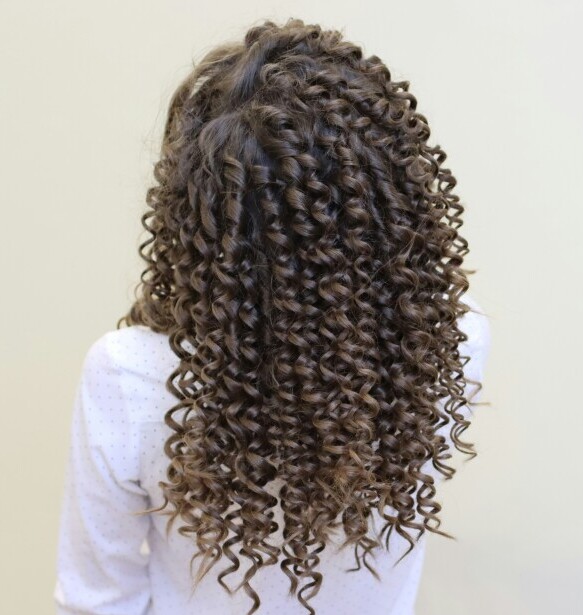
    Getting twist braid outs right can feel like an art form. You want those curls defined and radiant, right? Start by dividing your hair into manageable sections. This step is crucial because it helps keep your twists uniform and organized, ensuring each strand receives the attention it deserves.

    Twisting may seem straightforward, but the magic lies in consistency. Focus on applying even pressure and maintaining the same size for each twist. This method guarantees a neat, cohesive look where every part of your hair tells the same story.

    Sometimes things don’t go as planned. Maybe a twist unravels or a section frizzes. Spotting these issues early and knowing how to tackle them saves you from any style mishaps. It’s all about practice and learning from each twist.

    Another game-changer is keeping your hands lightly oiled. This small trick helps reduce frizz and leaves behind a sleek finish. Remember, practice makes progress, so don’t shy away from experimenting until you find your rhythm.

    Beyond the Basics: Elevating Your Twist Braid Out Game

    Once you’ve got the foundation down, mix it up with different twisting styles. Going for a flat twist instead of traditional ones can freshen up your vibe, adding a sleek profile to the look. If your twist style is looking messy, you can do a twist out to help it look fuller and amazing.

    Accessories transform a twist braid out into something uniquely yours. A well-placed bead or stylish pin can elevate the aesthetic while adding a touch of personal flair. Hair wraps aren’t just for convenience; they’ve become a trendy statement that enhances every twist, showing style without saying a word.

    Hydration keeps a twist braid out looking lively long after styling. Using leave-in conditioners or lightweight oils can help keep curls popping over days. Retwisting at night or using a satin bonnet can maintain that perfect curl pattern, minimizing frizz and tangles.

    Don’t forget about edge maintenance, a crucial step that often gets overlooked. Touching up with a gentle edge control maintains that polished look. Every detail counts in keeping your twist braid out fresh and fabulous.

    Empowering Hair Care: Adopting Healthy Habits for Consistent Success

    Knowing your hair type is like understanding its language, helping tailor your care routine to its unique demands. This insight makes all the difference in achieving luscious results consistently—no more guessing games.

    Diet and hydration might not seem directly related to your twist outs, but they play a huge part. Drinking enough water and eating a balanced diet with lots of fruits and veggies can contribute to healthier, shinier hair. Strong hair from within is half the battle won in hair care.

    Routine is everything when it comes to maintaining healthy hair and fabulous twist outs. Setting consistent wash days, spacings between styles, and hydrating rituals balances style without compromising care. Life gets busy, but giving your hair regular TLC can lead to major benefits.

    Confidence comes through commitment and love for your natural hair. Nurturing your curls means making decisions that suit both your lifestyle and your hair’s needs, empowering you with styles that don’t just look good, but feel great too.

  • Creating Heat Free Curls With Flexi-rods

    I’m going to kick things off by talking about why heat-free hairstyling is catching on. We’ve all heard the warnings about heat damage from curling irons and hair straighteners, but it’s not just scare tactics. Excessive heat can seriously sap the strength and shine from your locks.

    Now what are flexi-rods? They’re simple tools for creating curls, designed to be gentle on hair. These bendable, foam rods come in various sizes and they’re game-changers for those who want to ditch heat. Choosing flexi-rods means you’re opting for a health-first approach to hairstyling.

    This isn’t just about avoiding damage; it’s also about embracing a healthier routine that promotes hair integrity over time. I’m here to guide you through the process of achieving bouncy, beautiful curls without the risk associated with heat styling.

    By the time you finish this article, you’re going to find out how to select the right flexi-rods for your hair and master the technique of creating heat-free curls that last. So let’s prepare to roll into the next section, where we’ll delve into choosing the perfect flexi-rods for your hair type.

    Choosing the Right Flexi-Rods for Your Hair Type

    If you’re eager to get started with flexi-rods, the first thing you’ll need to understand is that not all rods are created equal. They come in a variety of sizes, and each size serves a different purpose. So, I’m going to help you navigate the sea of options and choose the right flexi-rods for your unique hair type.

    Let’s talk about size for a moment. Flexi-rods range from about 7/16 of an inch to 7/8 of an inch in diameter. Generally, the narrower the rod, the tighter the curl. If it’s tight, springy curls you’re after, you’re going to want to go for the smaller sizes. On the flip side, for looser, beachy waves, the larger ones will be your best bet.

    Now, the texture and length of your hair play a big role in your flexi-rod choice. For those with fine or relaxed hair, smaller rods can create curls without much overlap, which can prevent tangles and breakage. Thick or coarse hair might need larger rods to handle the volume and weight of the hair. And if you have particularly long hair, you’ll want a flexi-rod that can take on the entire length without doubling up too much.

    If you’re a beginner, don’t worry too much about getting it perfect on the first try. It might take a couple of attempts to find the size that resonates with you. A good starting point is to grab a mixed pack of flexi-rods, available at most beauty supply stores or online. This way, you can experiment with different sizes and see what works best for your hair without committing to just one size.

    Next up, I’m going to walk you through the step-by-step process of actually using these flexi-rods to achieve beautiful curls. This includes everything from how to prepare your hair for the best results to the actual technique of wrapping your hair around the rods. So let’s move on to creating those gorgeous, heat-free curls.

    Step-by-Step Guide to Creating Curls with Flexi-Rods

    I’m going to walk you through creating bouncy, beautiful curls using flexi-rods, and no, you won’t need any heat at all. This method is gentle on your hair and can yield impressive results overnight or with a few hours’ patience.

    First things first, you’ll want to start with clean, damp hair. Why damp? Because it sets the stage for long-lasting curls. Just make sure it’s not sopping wet to avoid long drying times and potential discomfort.

    Sectioning your hair is crucial. Use clips to divide your hair into manageable parts, working with one section at a time. This ensures even coverage and uniform curl size. Aim for smaller sections for tighter curls and larger ones for looser waves.

    Now, you’re ready to roll – literally. Take a small section of hair, apply a styling product for hold, and wrap the end of your hair around the flexi-rod. Then, roll the rod up towards your scalp and bend the ends of the flexi-rod to secure it in place.

    It might take a couple of tries to get the hang of it, but don’t worry too much about perfection on your first go. Consistency comes with practice. Once all your hair is rolled up, you can either let it air dry or speed up the process with a hooded dryer on low heat, staying mindful that the goal is to avoid heat damage.

    Time is your friend when it comes to setting your curls. Leaving the flexi-rods in for at least five hours or overnight is ideal. Trust me, the wait is worth it for those heat-free, healthy curls.

    Maintaining Your Flexi-Rod Curls

    Once you’ve achieved those perfect curls without the heat, you’re going to want to make the most of them. Here’s how to keep those waves looking fresh and bouncy.

    First off, let’s talk about nighttime routines. The age-old pineapple method, where you loosely gather your curls at the top of your head, really does wonders. You might also consider a silk or satin bonnet – your curls will thank you for the reduced frizz and maintained moisture.

    Now, when it comes to products, choose wisely. A light holding spray can add longevity to your curls, but steer clear of anything that weighs them down. For touch-ups, a dab of hair oil on the ends will help to combat dryness without sacrificing the bounce.

    As for the dos and don’ts: DO sleep on a satin or silk pillowcase if you can. It’s a game-changer. DON’T disturb your curls too much when they’re set. Let them live their best life without too much manipulation.

    On the off chance your curls start to fall flat, revive them with a spritz of water and a little finger coiling. It’s a simple method that brings back definition and movement.

    That said, perfecting the upkeep of your curls is a journey. Some trial and error are involved, but don’t worry too much about getting everything right from the get-go. You can always tweak your approach as you learn what works best for your hair.

    Wrapping It Up: The Final Take on Flexi-Rod Curls

    I hope by now you’ve become a bit of a flexi-rod enthusiast. And why wouldn’t you? It’s a fantastic method for getting long-lasting curls without exposing your hair to heat damage. Practice, as they say, makes perfect, though you don’t need to strive for perfection. Even if your first few attempts aren’t flawless, the health of your hair will thank you for the effort.

    Remember, encountering a bump or two along your curling journey isn’t a cause for concern. Whether you’re dealing with uneven curls or the occasional rogue rod that won’t sit tight, it’s all part of the learning process. Adjust your approach as you go – you’ll find out that each time you do it, you’ll get better and quicker at it.

    Choose products that resonate with you, and don’t shy away from experimenting with different techniques. Everyone’s hair is unique, and the beauty of flexi-rods is that they can cater to a huge variety of hair types and desired styles. So go ahead and embrace the versatility they offer.

    I really hope that you feel confident in giving these heat-free wonders a whirl. Your hair is a canvas, and flexi-rods are just one more tool in your styling arsenal. Enjoy the curls, the compliments, and the satisfaction that comes from knowing you’re keeping your hair healthy. So my question to you today is, when are you planning to start your heat-free curl journey?

  • No heat year in 2020 – how I maintained it

    Can you live a year without heat on your hair especially when its afro 4C, extremely curly and difficult to manage. Well the answer to that will depend on the thickness of your hair, the porosity and also the surrounding individuals. This year, I managed to live most of it heat free. It has been challenging just enjoying my hair as it is in its curly state.

    Strategies for afro hair

    Now how did I survive you ma

    y wonder? Well each time I washed my hair after a wash day, I would try to air -dry it more than using a towel because I always felt that the towel just makes the hair get more tangled. Immediately I would get my wide-toothed comb and section it off, depending on the mood of the day, I would either put in twists or massive flat twists to save time. I also found that it helped to use moisturize on my hair to avoid it from getting too dry. This would mean that if I wanted to remove the twists or flat twists after some time, the hair will not be in its original state of shrinkage.


    Embrace the afro

    I soon learned to embrace my afro in its most natural state, without manipulation, I would just put oil and let it dry. This took some time to get used to, I will let you know why. Firstly, I grew up with this idea that your hair cannot be in the afro state at all. If it is in that state you must do something about it. Secondly, I remember some comments I would get with my hair in this state, none of them were compliments so this really plays with your mind. Thirdly, there is this idea that we always had when we were younger that if an individual’s hair is just in its original state, then it is unkempt.

    I had to acknowledge that these ideas were not right because I always wash my hair every single week. I always make sure to detangle and deep condition in order to keep my hair in good condition. Learning to just embrace my afro helped me to view these ideas as completely foreign and know that sometimes you have to love everything about you, regardless of what anyone thinks. This was a lesson for me and now when I view myself, I don’t acknowledge those negative views anymore.

    Care for the afro

    I realize how fragile and deprived my hair was because it get’s dry every 3 days. I had to learn how to moisturize it often. My scalp was quite sensitive and it really needed nourishment to minimize it from getting dry. I learned how to work in maintaining it, moisture and my hair are friends. I have low-porosity hair, that means that most times when I use a cream or some type of butter, it will just stay on my hair and take a long time to absorb. This meant that I had to start utilizing more light oils on my scalp like jojoba and argan oil. I also started minimizing the use of coconut on my hair although my hair certainly likes it, the only problem I get is when it solidifies.

    Maintenance

    With my hair, I would make sure that I wrap it up before going to bed. This is something that is necessary for maintenance of afro hair. When its neglected it tends to dry and becomes a lot more brittle and difficult to manage. I would also use my little bottle that had water should I want to add moisture to it. Any individual would think that the process is cumbersome, however if you want to maintain natural hair, unless you have other products that can keep it in good condition, this is necessary.

    It  made me think about all the things that were done to natural hair way before products came up. Although a few years back I was always looking for the next new product. I stopped getting a lot of products after realizing how some would not get used. I am also quite particular about what I use on my hair so I stopped getting the next new thing and just worked with all the items that I had.

    What do I use?

    When I wash my hair, I discovered Maui, I really love it. Although it can be costly, I got it on sale.

    I really like how wonderful it feels on my hair. I usually use this and most times just a shampoo that does not contain sulfates. I find with these types of shampoo’s I get fewer tangles and it also get’s well moisturized.

    Once I am done I normally get my conditioner which is mostly jojoba and sometimes coconut.

    I also put some oil on my scalp just to keep it from drying up, mostly shea butter. Which does not have much of a smell and does melt on the scalp.

    This process takes a shorter time as before this I used to spend at least half a day on my scalp, now after I wash it its quite a quick process, I just wash and put moisturizer and I am on my way.

    Deep Conditioning

    I use deep conditioning at least every month, although I want to experiment with that every week to see what will happen to the hair. I think especially in summer it would work, however in winter I would probably keep it to once a month.

    The deep conditioning that I use is Garner although this changed as I was only using henna conditioner.

    The main thing I find with deep conditioner, is that most of them can be used as they are mostly moisturizing to the hair. The amount of time you use it on your head depends, however the longer the better. I normally make sure that I have it on my head when I know that I will not be running too many errands, although even if you are running errands, there are so many options now to used to cover your head.

    The only challenge at the moment is that I certainly need a trim to make sure that my afro is in good condition.

    As I reflect on this year, firstly I would like to mention that although it has been difficult, I believe that there is a lot that I have learned and one thing I have learned to embrace is my hair. The best part of the journey has been learning just to embrace it as it is.

  • Wash and Go Styling for naturally curly hair

    Wash and Go

    Wash and Go, let’s just say this particular style took me a long time to adopt to. Well first of all getting used to the texture of your hair and allowing it just to stay as it is was a great learning curve for me. The fact that you grow up in a society where the afro is looked down upon, it took a really long time before I started getting comfortable with it. In my previous post I spoke about self-love and how it has an impact on how you look after yourself.  When I had to begin the process of accepting everything about myself including my hair, it took a long time. I was always using a blow dryer and I noticed everytime I used it my ends were thinning. It was quite terrible. I remember at that time I was still trying to figure out what to do with my hair and I discovered a really interesting source of information. I used a few products to help my curls get less frizzy due to the fact I had been addicted to relaxer and now I still had that need to have my hair more manageable.

    I ended up using clay as a treatment.

    Clay treatment

    This was amazing for me because I found that it was really safe on the hair and felt good when used on your head.
    As I was looking for various resources to assist me during this time, I came across a product known as Kinky curly. To say that this product was one of the best things that happened in my life would be an understatement. I started using it a long time before it became popular and loved how it worked on my hair. I remember being at University at that time, so the cost was a bit of an issue for me but I remember using it on every member of the family and letting them know how it would solve their hair woes.

    In terms of my hair type, it’s a mix between 4b and 4c texture. It’s not quite tough and when it’s blowdried it get’s quite soft. Most of the time people think I have used product to make it a certain way. I can only imagine what would happen if I was more consistent with products.

    Products

    One things I got to discover during the wash and go journey is that we don’t need to use too many products on our hair. I would have been a product junkie if I had access to many of the products that are in the market today, however I try to keep it simple because I think getting a product for $ 24 per item can tend to be alot and imagine if you are a student that can be  way too much money for it. So when I started this site, I thought if I was a student again, what would I tell my younger self? I would probably say, don’t spend too much on products and keep it simple, which is what I do today.

    In saying all this, does it mean that I always moisturise or stick to a consistent strategy. Well ever since I got my son I can say it’s a challenge, however when I had all the time in the world to fix my hair I was absolutely committed. I think it’s also great to be around individuals that are positive about themselves as that can assist you in learning how to be happy with yourself. I think with the information nowadays we have a great opportunity to meet with other like-minded individuals online. I do remember being part of some groups at that time, but it still took me a very long time to accept myself.

    How things change

    I find it extremely fascinating that the natural hair journey became a thing when I had been natural for over 10 years. I have finally found the confidence to be myself and not apologize for anything. I know how to look after my hair although I don’t spend too much time like I want to. I always make sure that I wash it every week as it’s curly and use products that are sulfate free such as GIOVANNI Tea Tree  . This particular shampoo makes my hair feel amazing. However if the cost seems a bit much I find that using the more natural soaps such as Himalaya Protein Shampoo for Dry,, It’s much cheaper and you can easily get a hold of it.

    There are a lot of products nowadays that cater to natural hair, however sometimes when they start becoming too commercialized sometimes you wonder if it still has the same impact. A few years ago the Keratin treatment became a really popular and I even considered doing it. I just think when you learn how to manager your hair in a certain way and then get to revert back to your original texture. It is a challenge. To this day I have friends that probably don’t know the texture of their hair because of the relaxers that they are used to and I can’t judge them because I know the struggle I had and I think everyone is on a different journey when it comes to natural hair.

    I can conclude that for me at this point in my life I have finally learnt to accept myself through the good hair days and bad hair days. I think I have learnt how to cope with each situation and this blog made me realise I should probably start getting back to the creative individual I once was. I have accepted my hair for what it is and would not change it for the world.

    What do you think of your natural hair and how has your journey been so far?